|
General information
|
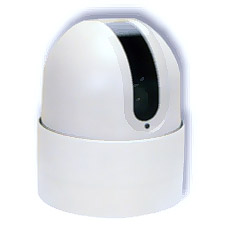
| For more details and information about the Daiwa DMP23-H2 unit, please contact Daiwa. |
|
Communications info
|
| Method: |
RS485 |
| Baudrate: |
9600 |
| Data bits: |
8 |
| Parity: |
None |
| Stop bits: |
1 |
|
Supported functions
|
| Type: |
Absolute |
| Pan: |
-180 to 180 (360 total - continuous) |
| Tilt: |
-90 to 0 (90 total) |
| Zoom: |
Yes |
| Focus: |
auto-focus |
| Iris: |
auto-iris |
|
Lens info
|
| Zoom: |
23x optical zoom, 2x digital zoom f=3.6~82.8, F1.6~3.7 |
Power requirements |
| Voltage: |
24V DC |
|
Protocol info
|
| Protocol name: |
Daiwa Communication Protocol |
| Number of units supported by protocol: |
254 |
|
Connection schemes
|
View PTZ connection to camera/video server
View camera/video server RS485 pin out |
| |
|
Dip switches settings
|
| DSW1, DSW2 |
These rotary DIP switches correspond to the value of Identity (in hexadecimal notation). The switch DSW1 is the upper rotary switch (mounted beside the switch SW1) and DSW2 is the lower rotary switch. |
| SW1: 1 |
Select termination of the RS485 bus with this switch. This is the left most switch on the DIP-switch SW1.
For the last unit, set this switch to ON.
For other units, set this switch to OFF.
|
| SW1: 2 |
Switch for selecting of Test mode, set this switch to OFF. |
| SW1: 3 |
Switch for selecting of Occupation, set this switch to ON. |
| SW1: 4 |
Switch for selecting of Baud rate. Set this switch to OFF.
OFF = 9600 baud.
ON = 4800 baud.
|
| SW1: 5 |
Switch for selecting of Occupation, set this switch to OFF. |
| SW1: 6 |
Switch for selection of Focus mod.
ON = AUTO.
OFF = MANUAL. |
|
Driver specific settings
|
| Identity: |
This is the address of the head connected to the camera(1-255). Please note that the address 255 is reserved for broadcast, i.e all the connected heads will receive commands sent to this address.
|
| Type: |
Selects whether the connected camera is a Generic Daiwa type, DMP15-h1 or a DMP23-h2 type.
|
| Setting of "Pan, Tilt and Zoom Steps" are only allowed when the Type "Generic" (see above) have been selected! |
| Min Pan step: |
This value is used for the low endpoint of the calculation for the pan axle i.e. if a command is sent to the dome to go to -180 pan degrees, this is the value that will be sent to the camera.
|
| Max Pan step: |
This value is used for the high endpoint of the calculation for the pan axle i.e. if a command is sent to the dome to go to 180 pan degrees, this is the value that will be sent to the camera.
|
| Min Tilt step: |
This value is used for the low endpoint of the calculation for the tilt axle i.e. if a command is sent to the dome to go to -90 degrees tilt, this is the value that will be sent to the camera.
|
| Max Tilt step: |
This value is used for the high endpoint of the calculation for the tilt axle i.e. if a command is sent to the dome to go to 0 degrees tilt, this is the value that will be sent to the camera.
|
| Min Opt. step: |
This value is used for the low endpoint of the calculation of the optical zoom i.e. if a command is sent to the dome to go to zoom 1 (minimum zoom), this is the value of the optical zoom that will be sent to the camera.
|
| Max Opt. step: |
This value is used for the high endpoint of the calculation of the optical zoom i.e. if a command is sent to the dome to go to zoom 9999 (maximum zoom), this is the value of the optical zoom that will be sent to the camera.
|
| Min Dig. step: |
This value is used for the low endpoint of the calculation of the digital zoom i.e. if a command is sent to the dome to go to zoom 1 (minimum zoom), this is the value of the digital zoom that will be sent to the camera.
|
| Max Dig. step: |
This value is used for the high endpoint of the calculation of the digital zoom i.e. if a command is sent to the dome to go to zoom 9999 (maximum zoom), this is the value of the digital zoom that will be sent to the camera.
|
| Zoom movement degrees: |
When zooming in or out the view angle of the image is also changed, this view angle is used to calculate how many degrees the camera should move when a point in the image is clicked. The view angle can be adjusted for 11 different values in the zoom span. Follow this procedure to set these values:
- Click the Home button.
- Send the zoom to 1 by using this CGI command "http:// /axis-cgi/com/ptz.cgi?camera= &zoom=1".
- Click a point in the image on the pan axle (click to the left or to the right of the center only, not over or under).
- If the camera moves too far, decrease the View angle value for the zoom level chosen in step 2. If the camera moves too little, increase the View angle value for the zoom level chosen in step 2, then go to step 3. If the point that was clicked centered correctly, then go to step 5.
- Send the zoom to 1000 by using this CGI command "http:// /axis-cgi/com/ptz.cgi?camera= &zoom=1000", then go to step 3. Do this for 2000, 3000 and so on up to 9999.
|
| Focus, Time: |
The maximum time for a focus move, used when you click the ends of the relative focus bar. If you click closer to the center, the time will be scaled to reflect this. i.e the further from the center you click, the longer the time used. This also affects the "rfocus" cgi-command. |